Build a Django Control Room Panel
If you want to learn how custom panels work in Django Control Room, the best way is to build one.
Django Control Room supports a growing ecosystem of panels that extend the Django admin with operational tooling.
Every panel, official or third-party, is built on dj-control-room-base, a small shared library that provides the base classes, settings, permissions, and design system every panel plugs into. You won't need to think about it much in this guide, since the cookiecutter template wires it up for you, but it's worth knowing it's there.
In this guide we will build a simple panel from scratch: a settings explorer that displays Django configuration in a searchable table.
This is a great first panel because it is:
- easy to understand
- immediately useful
- mostly read-only
- not dependent on external services
- a good way to learn the shape of a Control Room panel end to end
The goal is not to build the most powerful panel possible. The goal is to build a panel that is small, illustrative, and approachable, so you can understand the structure of a Django Control Room panel from top to bottom.
What you'll build
By the end of this guide, you will have built:
- A panel that lists Django settings in a searchable table
- Full integration with the Control Room shell, including sidebar navigation, theming, and permissions
- A reusable pattern you can adapt for many other custom panels
Prerequisites
You should have the following installed:
python3.9 or greatergitdockercookiecuttermake
Scaffold the project
Use the official cookiecutter template to generate your panel boilerplate. This gives you a functioning base panel, plus an example Django project already wired up with both your panel and Django Control Room.
pip install cookiecutter
cookiecutter https://github.com/django-control-room/cookiecutter-dj-control-room-plugin
Once generated, you will have a project that is ready to run locally.
Get your panel running
The cookiecutter template includes a Docker Compose setup and a handful of make commands to help you get started quickly.
make docker_up     # bring up the dev server
make docker_shell  # enter a shell on the dev container
Once you are inside the running container, you can work with the example project like any other Django project:
# From inside the dev container
cd example_project
python manage.py migrate              # only needed the first time
python manage.py createsuperuser      # needed to access the admin
python manage.py runserver 0.0.0.0:8000
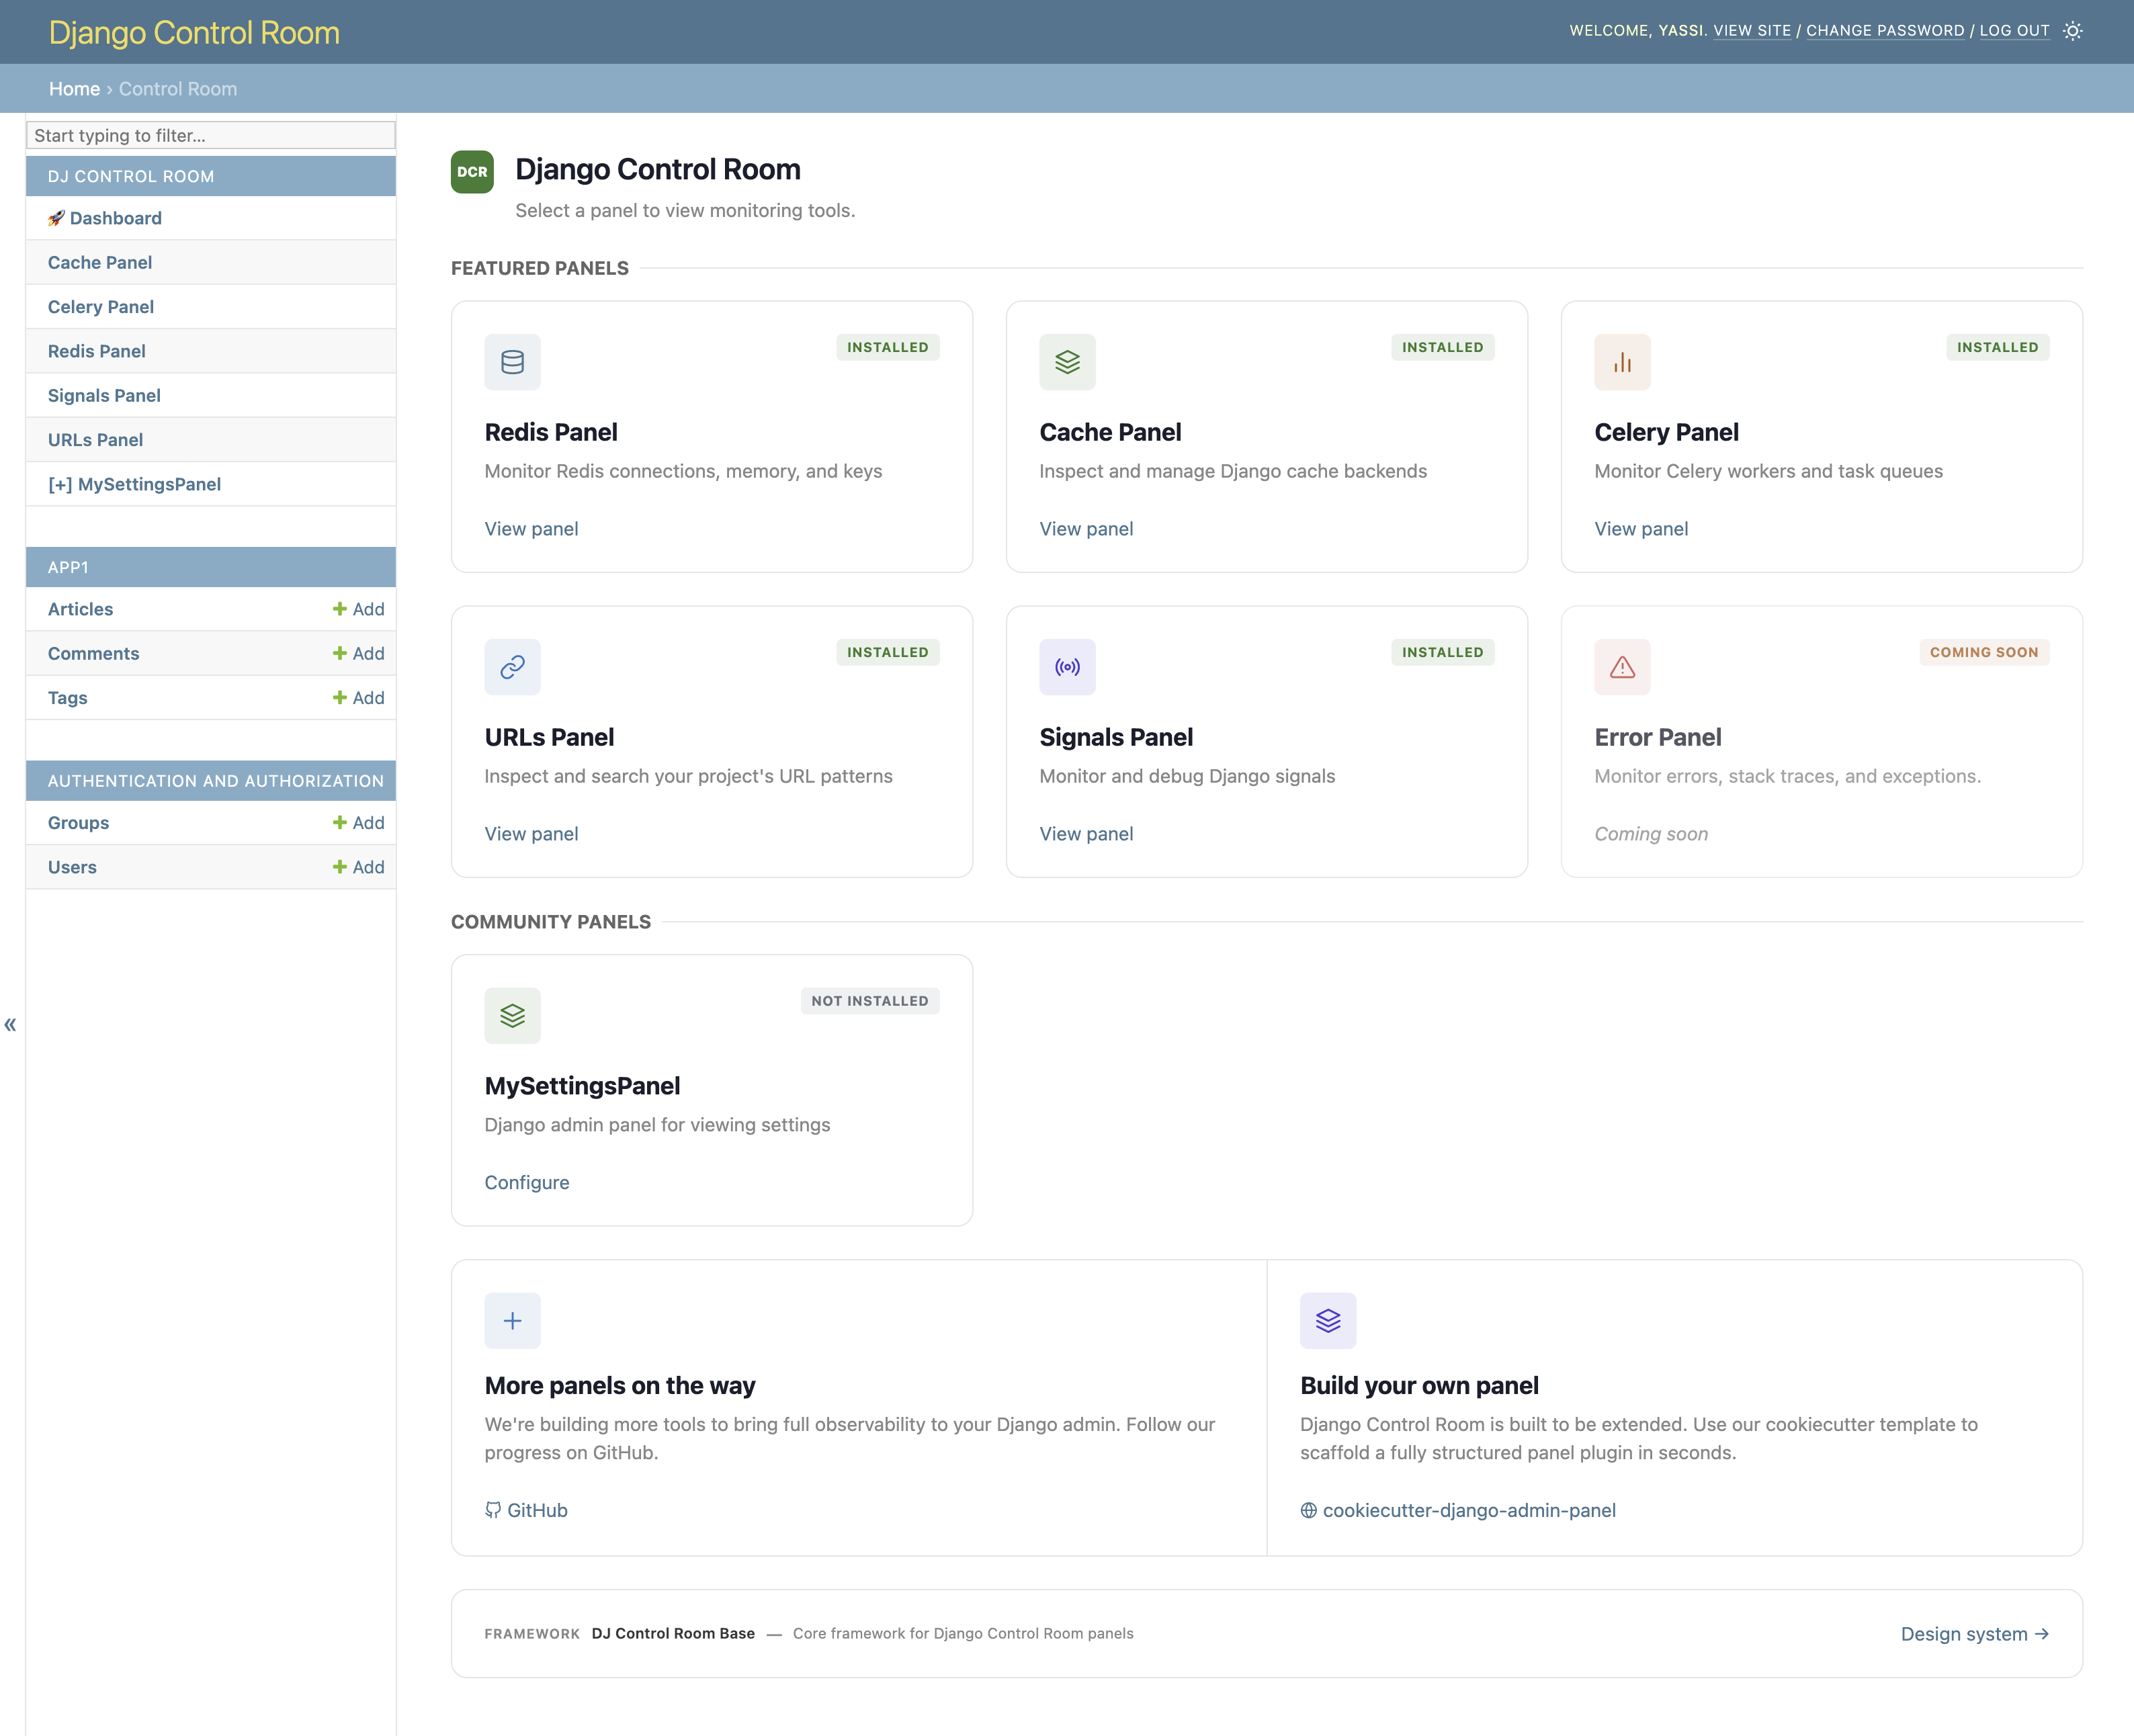
You can now navigate to your admin site, as well as Django Control Room, at http://localhost:8000/admin/dj-control-room.
You should see a new community panel available with the title of your project.
Congratulations. Setup is complete. At this point, you already have a working panel shell and can begin building your actual feature.
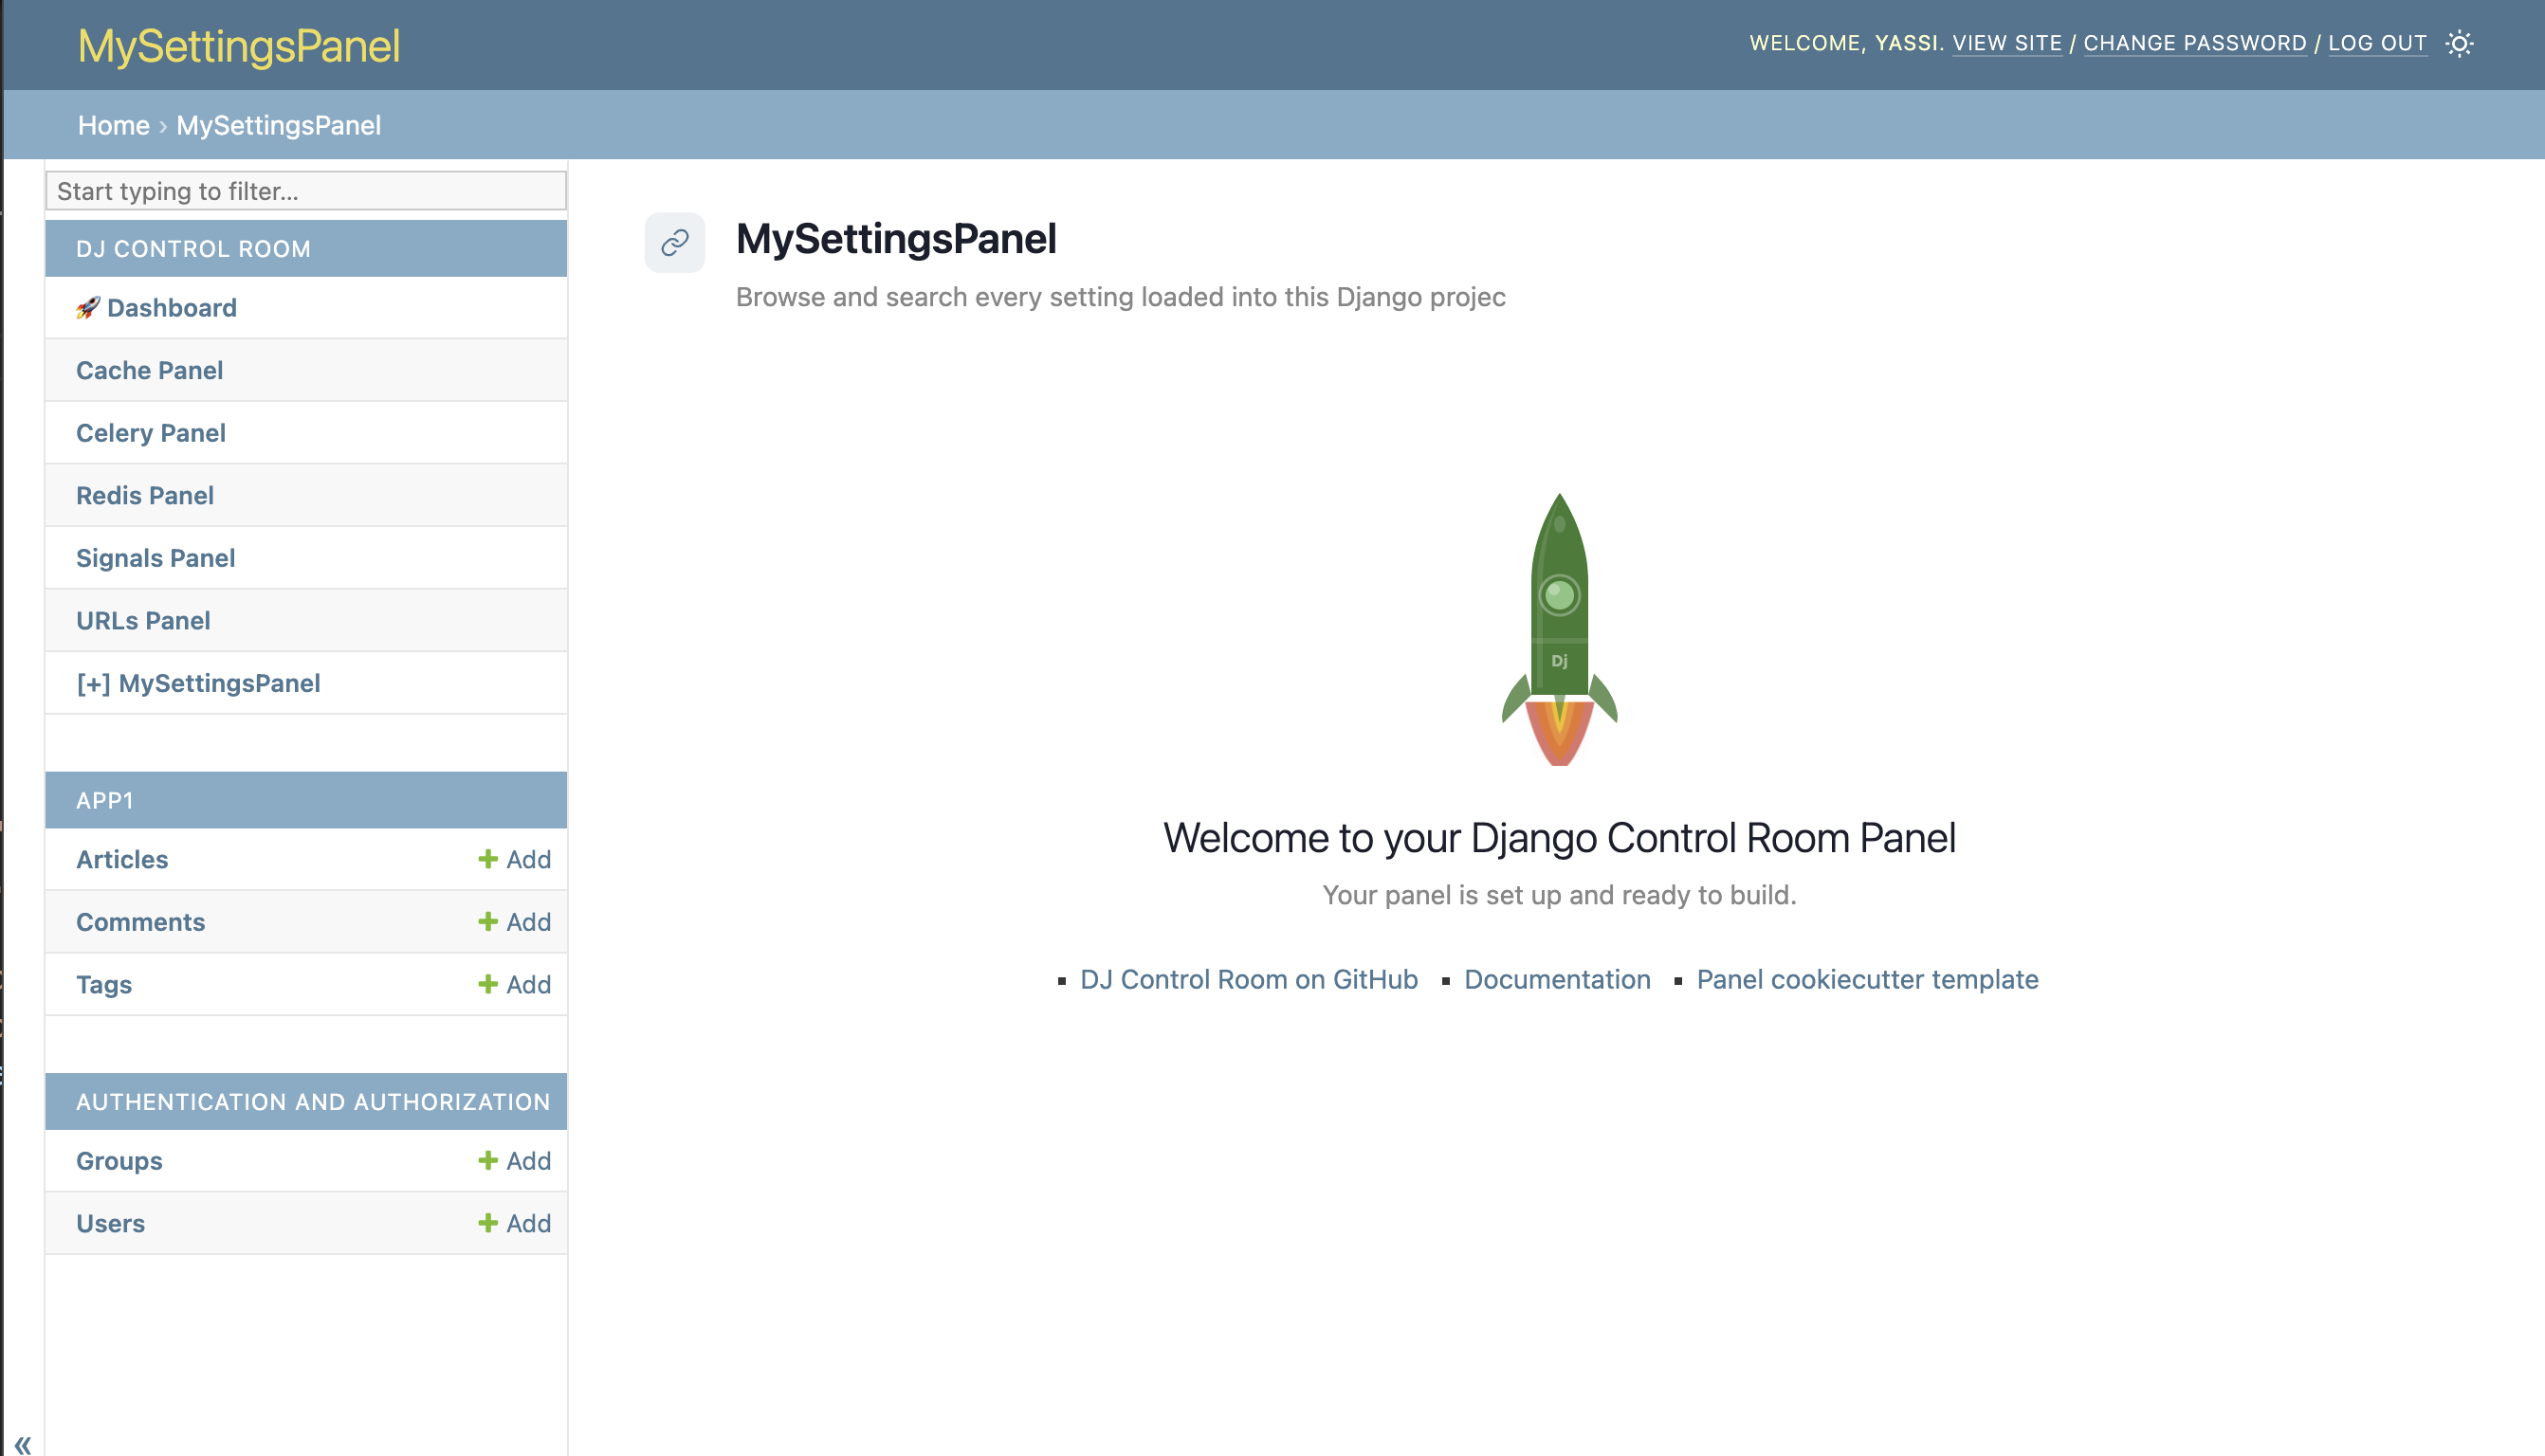
If you click into your new panel, you will be greeted with a basic boilerplate page inviting you to create something great.
Understand the file structure
You will notice a folder at the root of your project with the name of your package. This is the Python module where your panel source code lives. It is also what gets installed if you publish the package to PyPI or install it into another environment.
mysettingspanel/
├── __init__.py
├── admin.py
├── apps.py
├── conf.py
├── models.py
├── panel.py
├── tools.py
├── urls.py
├── views.py
└── templates/
    └── mysettingspanel/
        └── index.html
    └── static/mysettingspanel/css
        └── styles.css
This looks a lot like a normal Django app, with a few additions.
panel.py
panel.py defines what your panel is. It subclasses PanelPlugin from dj-control-room-base, and every panel created for Django Control Room needs one so Control Room knows how to display it in the dashboard.
The cookiecutter template already generates this file for you, so you can start from a working base.
conf.py
conf.py instantiates a PanelConfig, also from dj-control-room-base. This one object becomes the single source of truth for your panel's settings, CSS loading, and permission checks. Your views will read from it directly, which is what lets a panel work consistently whether it is installed standalone or inside the Control Room hub.
models.py and admin.py
You will also notice generated models.py and admin.py files. This panel does not require any database tables of its own, but these files still play a role.
models.py defines a PanelPlaceholderModel subclass (from dj-control-room-base) and admin.py registers it with a BasePanelAdmin. Together they are what makes the panel show up as a sidebar entry in Django admin, without needing an actual database table. In many cases, you will not need to modify them unless your panel introduces its own persistent data model.
tools.py
tools.py is where you register panel tools: optional, structured callables that Django Control Room can expose to AI agents over MCP. The template generates a working hello_world tool so you can see the shape of it. We won't extend it in this guide, but it's a good next step once your panel works.
example_project
The example_project directory is not part of your distributable panel package. It exists to give you a real Django environment where you can develop and test your panel.
tests
A tests directory is also generated at the repo root. This is a good place to put tests for panel behavior that should not be bundled directly into the installable package. We won't be adding tests in this guide, but know that it's generally a good practice to add tests.
Start by displaying settings
We'll begin simply by echoing project settings into the page.
Django exposes runtime settings through django.conf.settings, so pulling these into a view is straightforward.
Rather than wiring up admin context and permission checks by hand, we lean on the panel_config object the cookiecutter template already generated in conf.py. Its permission_required decorator gates access, and get_context builds the template context for us, including the admin layout and CSS.
Update your views.py like this:
from django.conf import settings
from django.shortcuts import render

from .conf import panel_config


@panel_config.permission_required("index")
def index(request):
    """
    Display all settings.
    """
    all_settings = {
        name: value
        for name, value in settings.__dict__.items()
        if not name.startswith("_")
    }

    context = panel_config.get_context(
        request,
        title="MySettingsPanel",
        settings=all_settings,
    )
    return render(request, "admin/mysettingspanel/index.html", context)
Then replace most of the starter template in index.html with a simple loop. Note that we fill in the panel_content block rather than content directly, since the generated base.html extends dj_control_room_base/panel_base.html, which sets up the admin layout and design system CSS for every panel.
{% extends "admin/mysettingspanel/base.html" %}
{% load i18n static %}

{% block panel_content %}
  {% for name, value in settings.items %}
  <h1>{{ title}}</h1>
    <div>
      <h3>{{ name }}</h3>
      <p>{{ value }}</p>
    </div>
  {% endfor %}
{% endblock %}
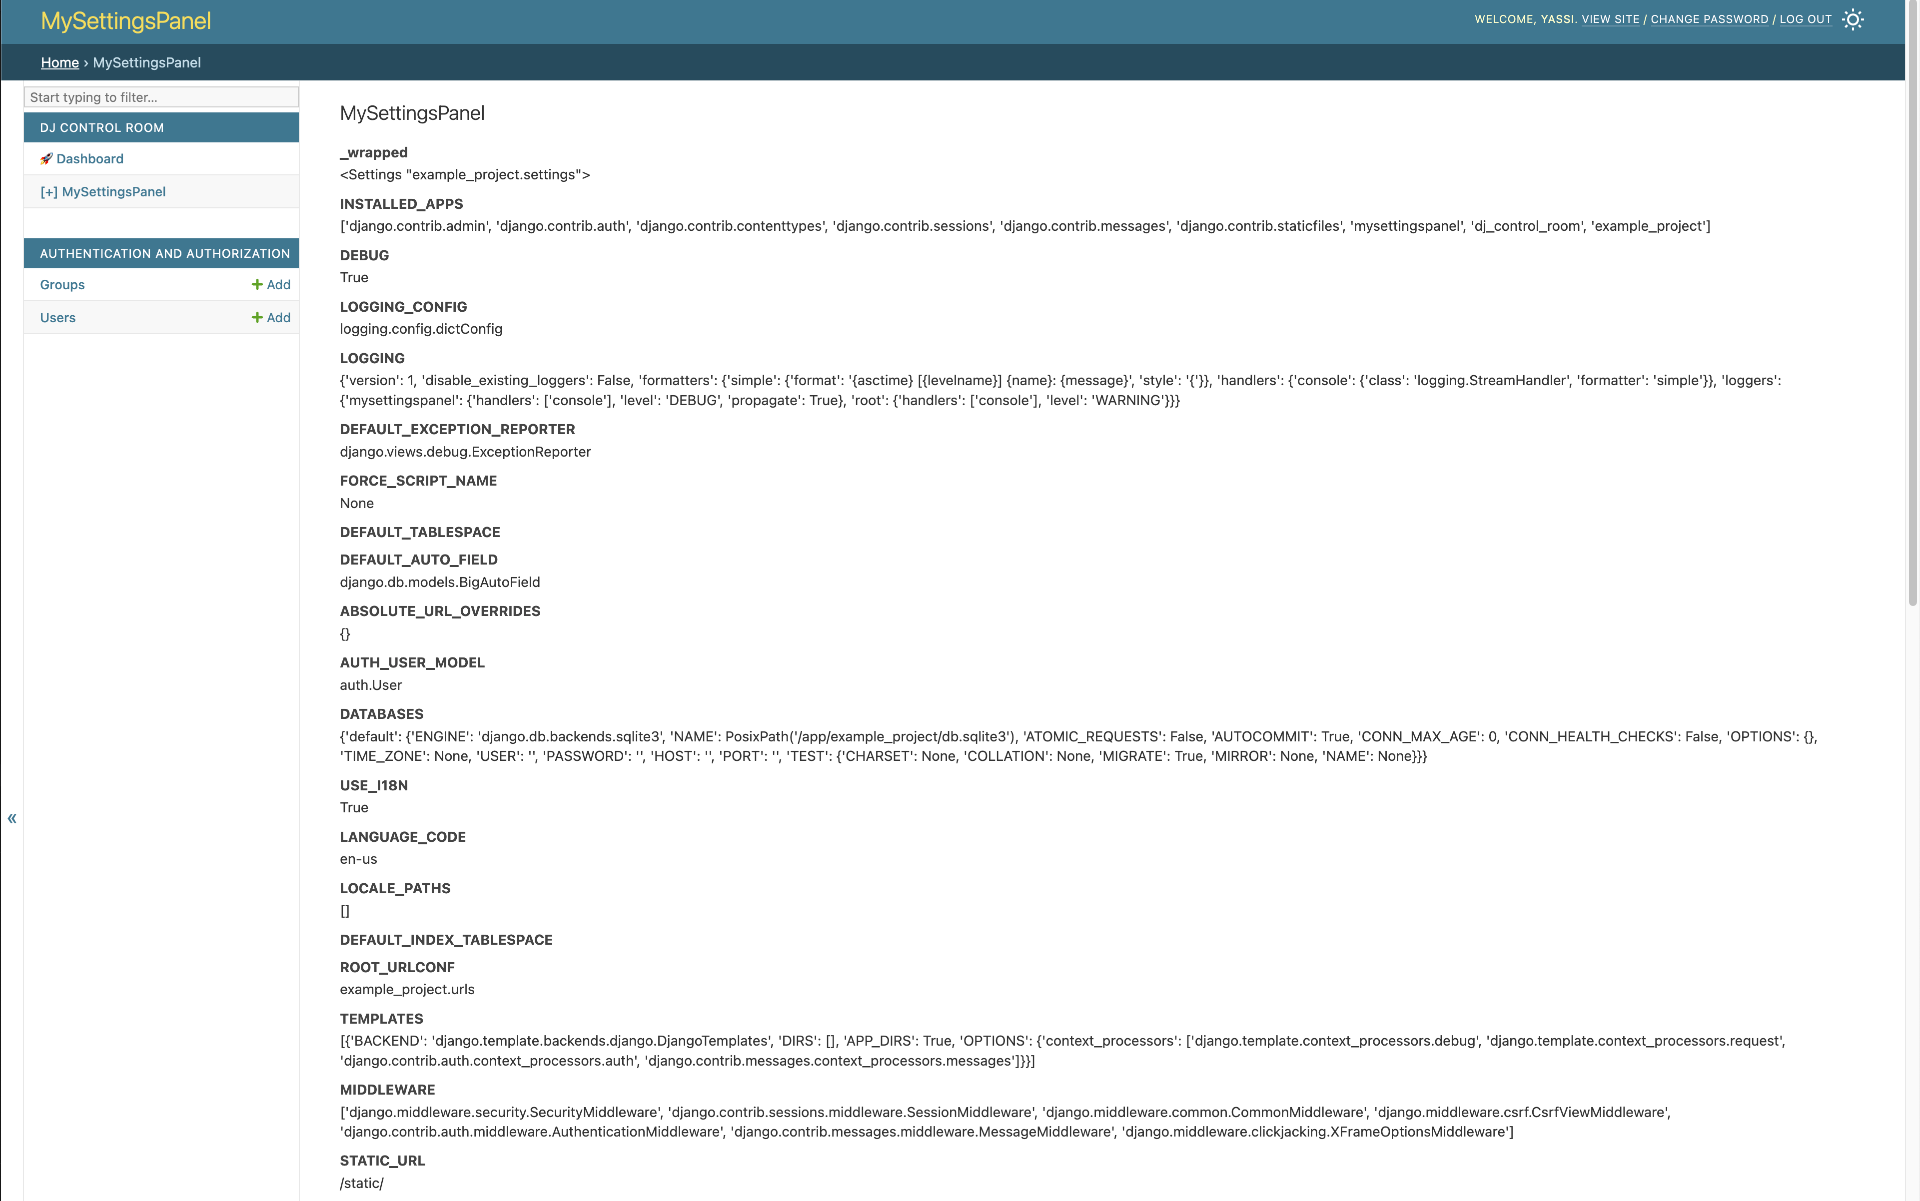
These small changes are enough to create a working panel that displays project settings. It will not look especially polished yet, but it already demonstrates the core flow: gather data in a Django view, pass it into the template, and render it inside the Control Room shell.
Style it with the Control Room design system
Before adding more logic, let's make the page feel like a first-class Control Room panel.
Your base.html already extends dj_control_room_base/panel_base.html, which loads a shared design system: a set of CSS tokens and dcr-* component classes that every official panel builds on. Rather than reaching for Django admin's own styling or inventing your own markup, the fastest path to a polished panel is to reuse the components that are already there.
A settings explorer is a data table, so we'll reach for two components: dcr-page-header for the title area, and dcr-data-table for the table itself, which gives us a titled, bordered card with a header zone for free.
Update index.html to use them:
{% extends "admin/mysettingspanel/base.html" %}
{% load i18n static dcr_icons %}

{% block panel_content %}
<div class="dcr-page-header">
  <div class="dcr-page-header__main">
    <div class="dcr-page-header__icon dcr-icon-color--accent">
      {% dcr_icon "cog" %}
    </div>
    <div class="dcr-page-header__body">
      <h1 class="dcr-page-header__title">MySettingsPanel</h1>
      <p class="dcr-page-header__subtitle">Browse and search every setting loaded into this Django project.</p>
    </div>
  </div>
</div>

<div class="dcr-data-table">
  <div class="dcr-data-table__header">
    <div class="dcr-data-table__header-info">
      <h3 class="dcr-data-table__title">
        Settings <span class="dcr-badge">{{ settings|length }} shown</span>
      </h3>
      <p class="dcr-data-table__subtitle">All Django settings currently loaded for this project.</p>
    </div>
  </div>

  <div class="dcr-data-table__scroll">
    <table>
      <thead>
        <tr>
          <th>Name</th>
          <th>Value</th>
        </tr>
      </thead>
      <tbody>
        {% for name, value in settings.items %}
        <tr>
          <td><span class="dcr-code">{{ name }}</span></td>
          <td>{{ value }}</td>
        </tr>
        {% endfor %}
      </tbody>
    </table>
  </div>
</div>
{% endblock %}
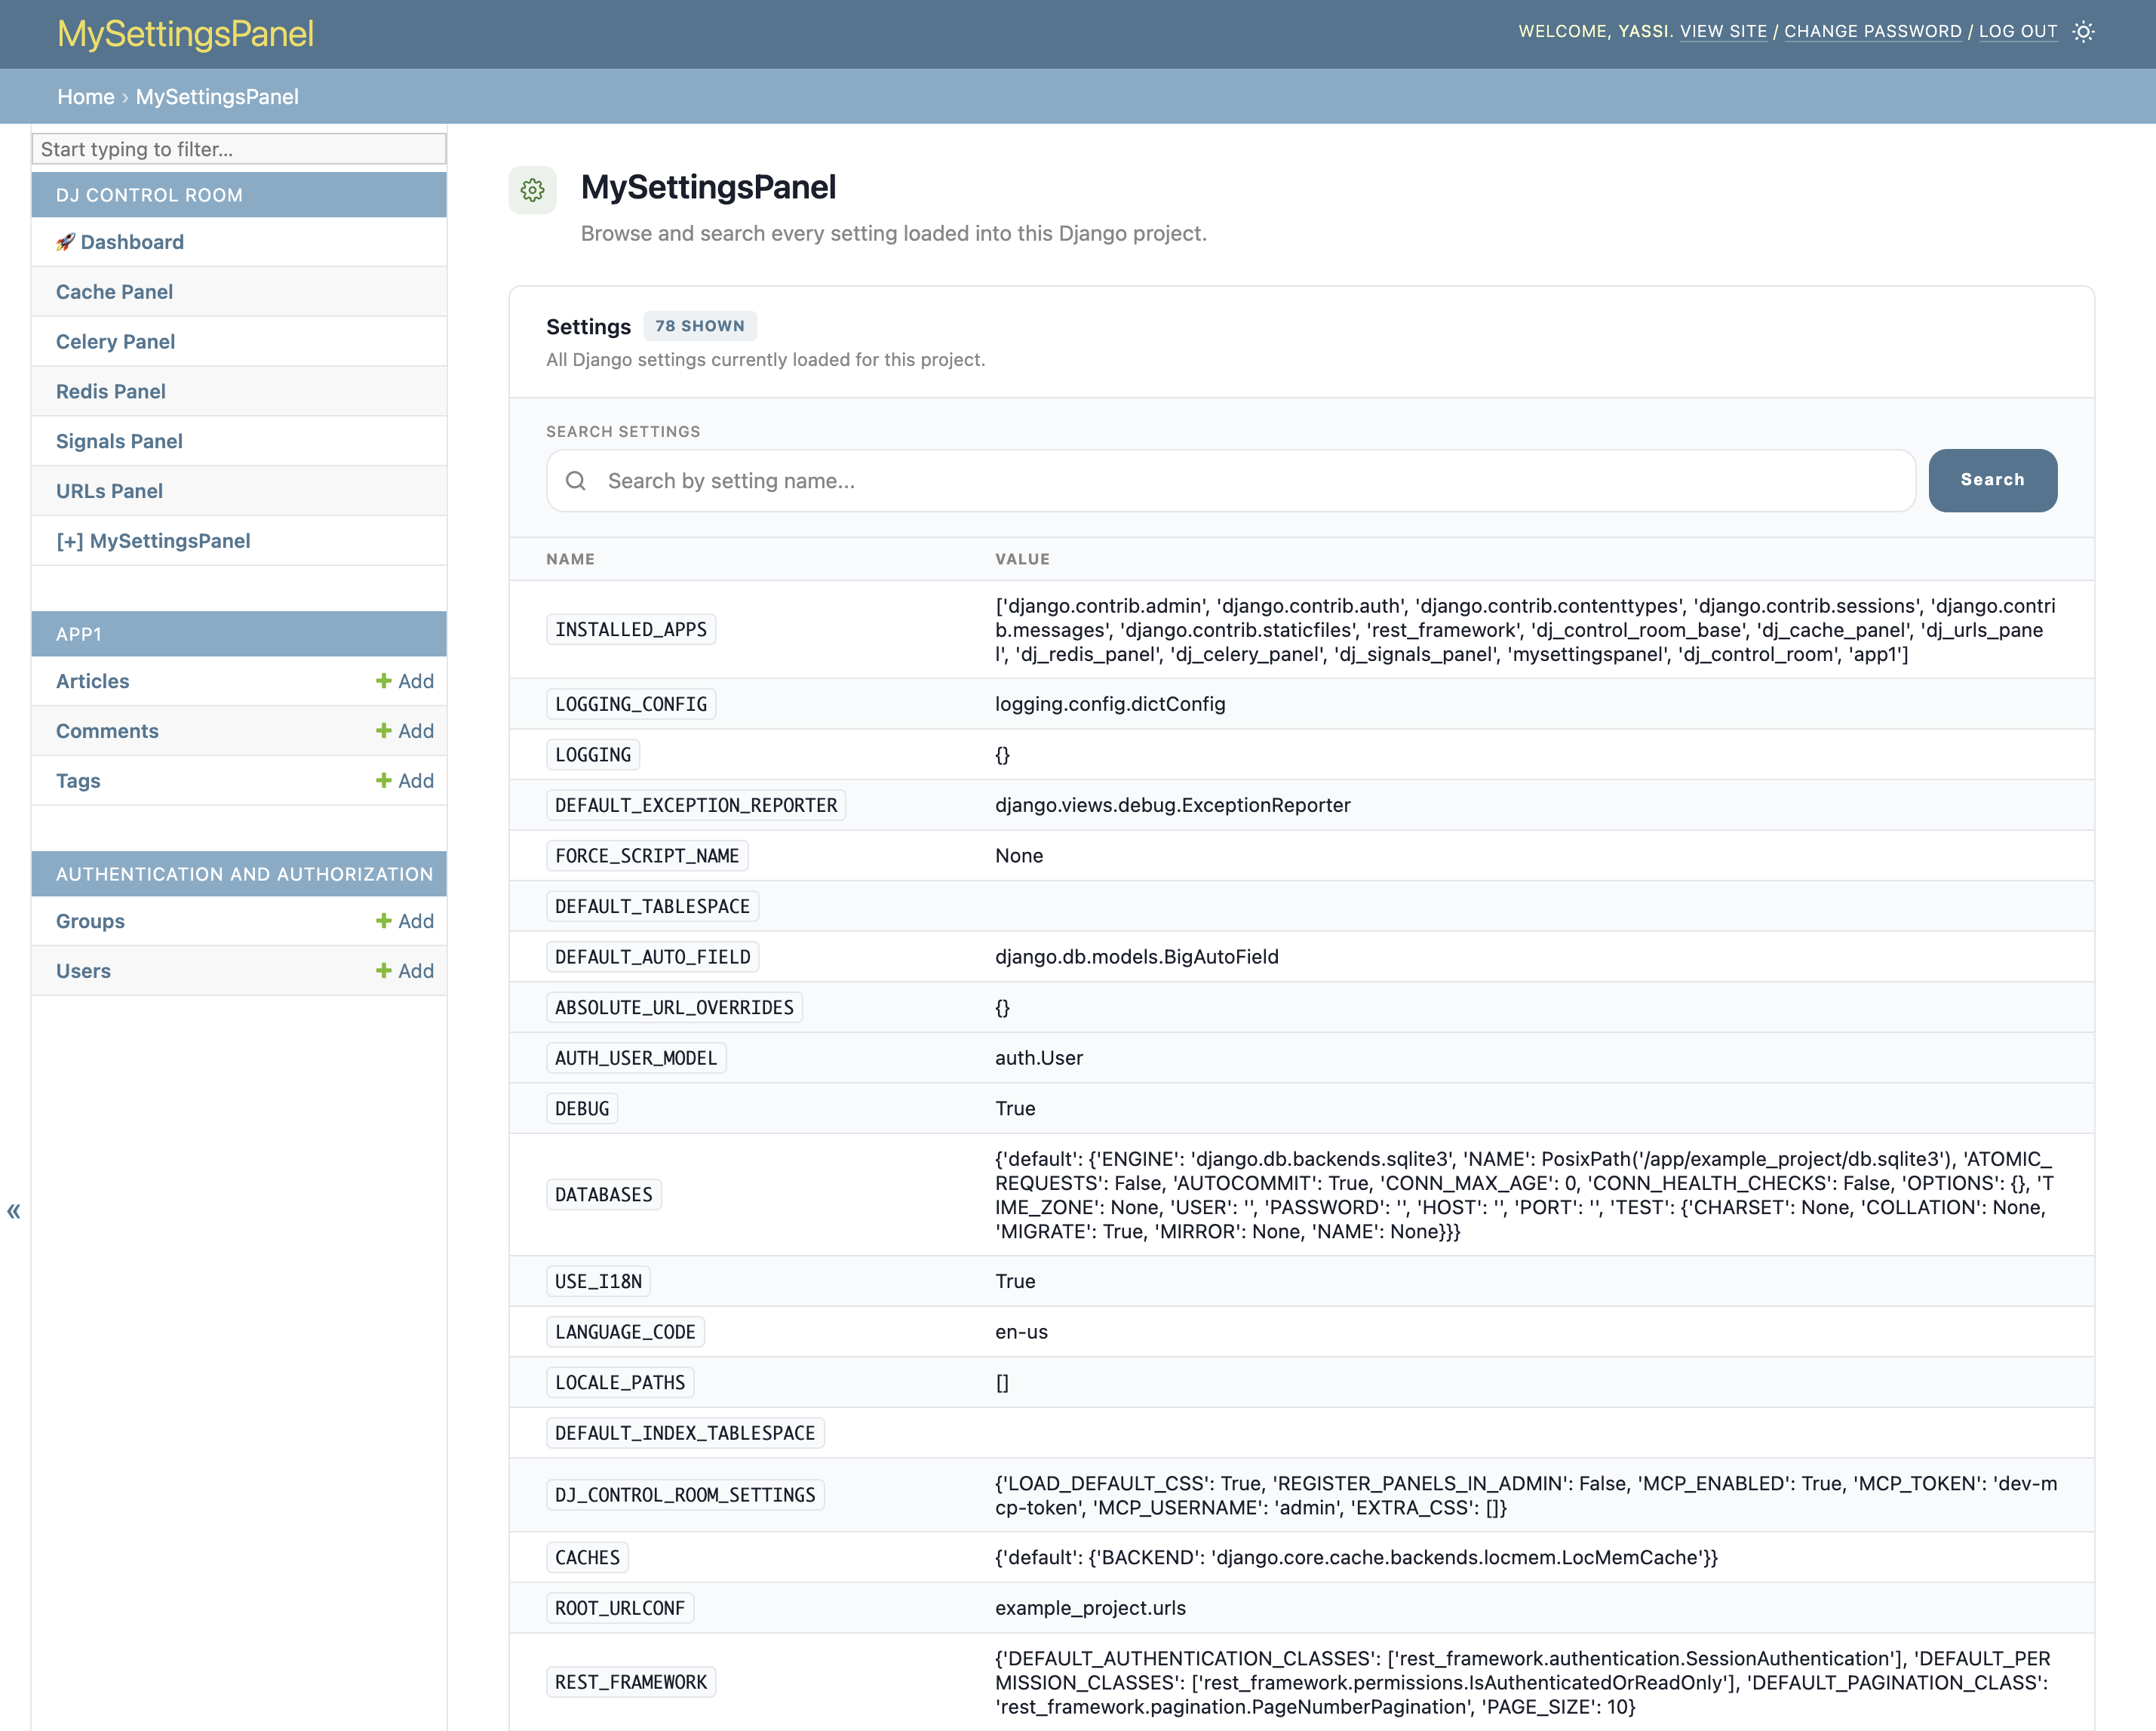
None of this is bespoke CSS. dcr-page-header, dcr-data-table, dcr-badge, and dcr-code are all documented components from the design system, and they already respect light/dark mode and whatever theme the host admin site uses.
Wire it all together
Now update the view in views.py to pull everything from django.conf.settings, filter by the search query, and pass it all into the template.
We also add a safety check: this panel should only work when DEBUG = True. This follows the same pattern as Django's built in debug error pages: exposing settings is fine during development but should never happen in production. If someone tries to access it with DEBUG = False, we raise a 404.
from django.conf import settings
from django.http import Http404
from django.shortcuts import render

from .conf import panel_config


@panel_config.permission_required("index")
def index(request):
    """
    Display all settings in a table.

    Allows for searching and filtering of settings via GET parameter q.
    Only available when DEBUG is True (like the Django debug error page).
    """
    if not settings.DEBUG:
        raise Http404("This panel is only available when DEBUG is True.")

    search_query = request.GET.get("q", "").strip().lower()
    all_settings = {
        name: value
        for name, value in settings.__dict__.items()
        if not name.startswith("_")
    }

    if search_query:
        all_settings = {
            name: value
            for name, value in all_settings.items()
            if search_query in name.lower()
        }

    context = panel_config.get_context(
        request,
        title="MySettingsPanel",
        settings=all_settings,
        search_query=search_query,
        settings_count=len(all_settings),
    )
    return render(request, "admin/mysettingspanel/index.html", context)
permission_required and the DEBUG check are doing two different jobs here: the decorator enforces who can see the panel at all (staff, plus whatever groups you configure via ALLOWED_GROUPS in conf.py), while the DEBUG check is a hard stop specific to this panel, since dumping settings is only ever appropriate outside of production.
Now update the template to add a search field. dcr-data-table has a dedicated controls zone for exactly this, and the design system ships form primitives (dcr-form, dcr-input-group, dcr-btn) so you never have to style a search box by hand:
{% extends "admin/mysettingspanel/base.html" %}
{% load i18n static dcr_icons %}

{% block panel_content %}
<div class="dcr-page-header">
  <div class="dcr-page-header__main">
    <div class="dcr-page-header__icon dcr-icon-color--accent">
      {% dcr_icon "cog" %}
    </div>
    <div class="dcr-page-header__body">
      <h1 class="dcr-page-header__title">MySettingsPanel</h1>
      <p class="dcr-page-header__subtitle">Browse and search every setting loaded into this Django project.</p>
    </div>
  </div>
</div>

<div class="dcr-data-table">
  <div class="dcr-data-table__header">
    <div class="dcr-data-table__header-info">
      <h3 class="dcr-data-table__title">
        Settings <span class="dcr-badge">{{ settings_count }} shown</span>
      </h3>
      <p class="dcr-data-table__subtitle">All Django settings currently loaded for this project.</p>
    </div>
    {% if search_query %}
    <div class="dcr-data-table__actions">
      <a href="?" class="dcr-btn dcr-btn--ghost dcr-btn--sm">Clear</a>
    </div>
    {% endif %}
  </div>

  <div class="dcr-data-table__controls">
    <form class="dcr-form" method="get">
      <div class="dcr-form__row dcr-form__row--stretch">
        <div class="dcr-field dcr-field--grow">
          <label class="dcr-field__label" for="q">{% trans "Search settings" %}</label>
          <div class="dcr-input-group">
            <svg class="dcr-input-group__icon" xmlns="http://www.w3.org/2000/svg" viewBox="0 0 24 24" fill="none" stroke="currentColor" stroke-width="2.5" stroke-linecap="round" stroke-linejoin="round"><circle cx="11" cy="11" r="8"/><path d="m21 21-4.3-4.3"/></svg>
            <input id="q" class="dcr-input-group__input" type="text" name="q"
                   value="{{ search_query }}" placeholder="Search by setting name...">
          </div>
        </div>
        <button type="submit" class="dcr-btn dcr-btn--primary">{% trans "Search" %}</button>
      </div>
    </form>
  </div>

  <div class="dcr-data-table__scroll">
    <table>
      <thead>
        <tr>
          <th>Name</th>
          <th>Value</th>
        </tr>
      </thead>
      <tbody>
        {% for name, value in settings.items %}
        <tr>
          <td><span class="dcr-code">{{ name }}</span></td>
          <td>{{ value }}</td>
        </tr>
        {% endfor %}
      </tbody>
    </table>
  </div>
</div>
{% endblock %}
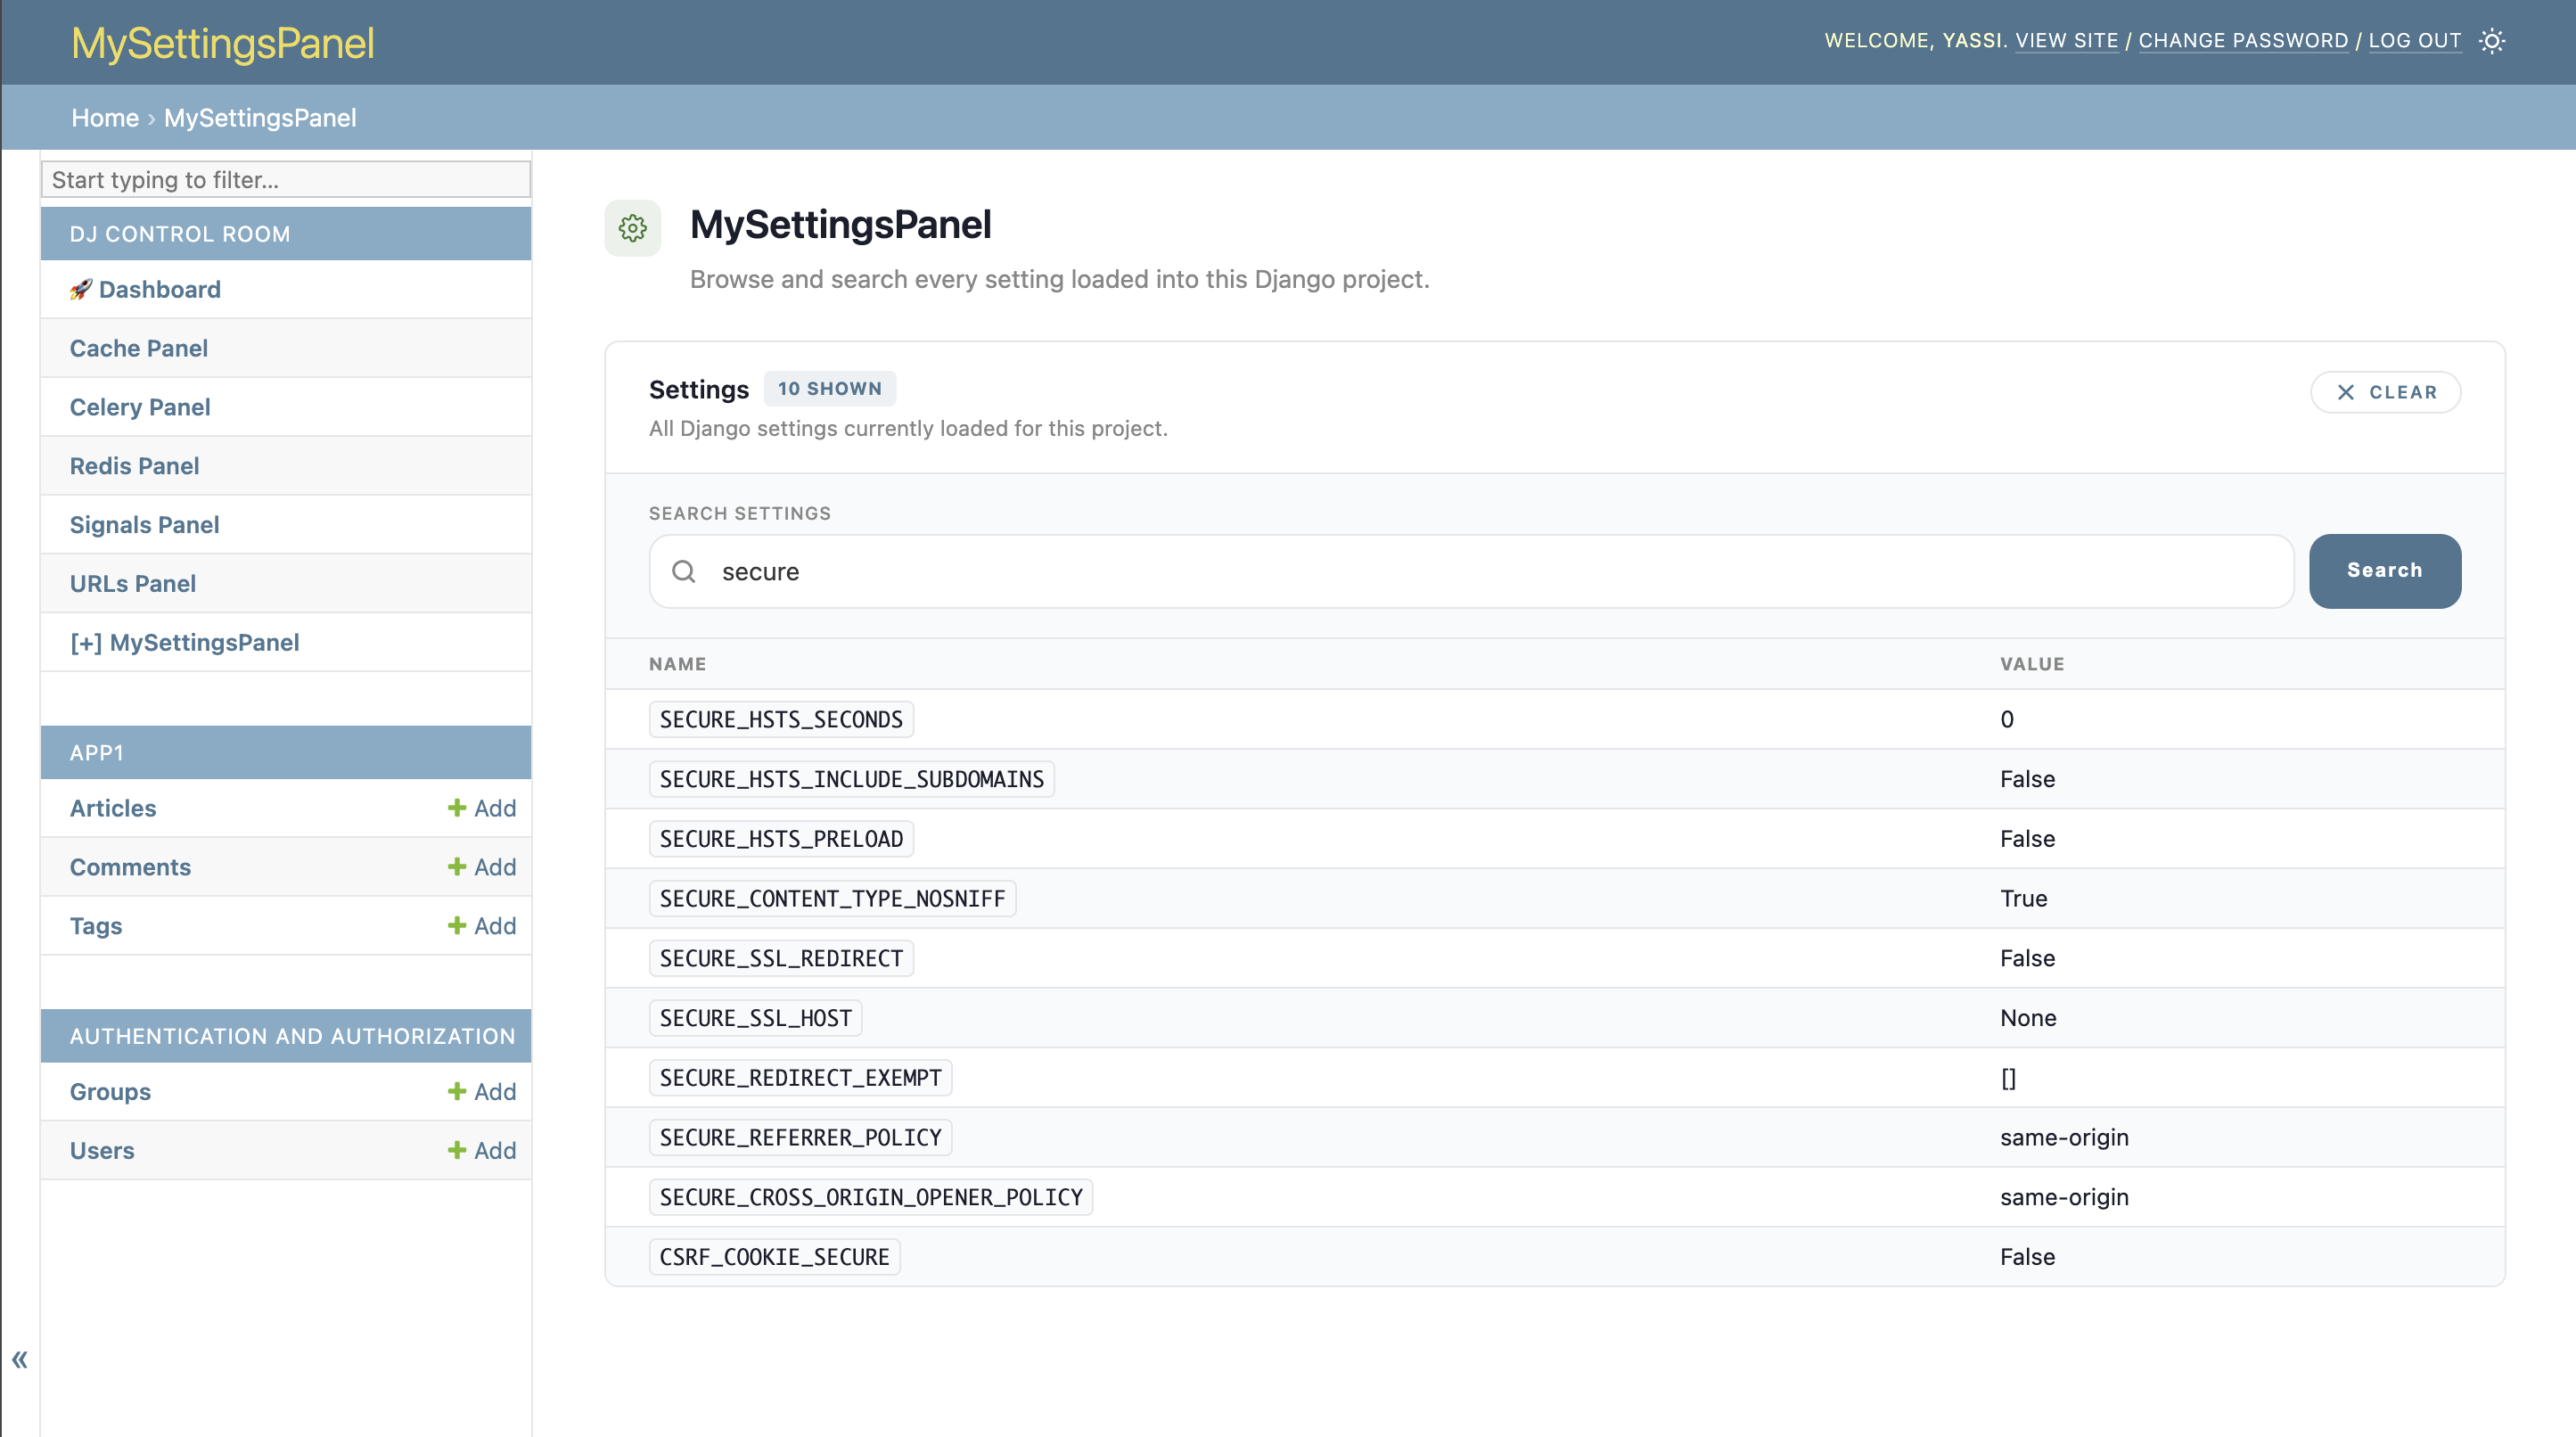
At this point, you have a working searchable settings explorer, built entirely out of shared design system components rather than one-off CSS.
Security: Redact sensitive values
A panel like this becomes much more useful once it is safe to use.
Even in internal tooling, you should avoid rendering secrets directly into the admin UI. A good starting point is to automatically mask settings whose names suggest sensitive values.
For example, values containing names like these should be redacted:
SECRET_KEYPASSWORDTOKENAPI_KEYACCESS_KEY
Here is one simple way to do that in the view layer:
SENSITIVE_TOKENS = ["SECRET", "PASSWORD", "TOKEN", "KEY", "API"]


def is_sensitive(name: str) -> bool:
    upper_name = name.upper()
    return any(token in upper_name for token in SENSITIVE_TOKENS)


def redact_value(name: str, value):
    if is_sensitive(name):
        return "********"
    return value
Then apply that when building all_settings:
all_settings = {
    name: redact_value(name, value)
    for name, value in settings.__dict__.items()
    if not name.startswith("_")
}
This is not a complete security model, but it is a very good default for a starter panel and demonstrates an important pattern: panels should be conservative about sensitive data.
If you want to take this further later, you can also add logic for nested structures such as DATABASES or CACHES so that credentials inside dictionaries are masked as well.
Warning: For Learning Only
This panel is designed for educational purposes. In production environments, leaking secrets such as SECRET_KEY, API_KEY, or database credentials can lead to serious security breaches. Always audit and harden your admin panels before exposing them to any users. Consider additional security measures like IP restrictions, audit logging, and role-based access controls.
Where to go from here
Congratulations. You now have a fully functional panel compatible with Django Control Room.
Not only that, you also built a reusable extension to the Django admin. That is a powerful pattern.
From here, there are a number of directions you could take:
- Add value formatting for lists, tuples, and dictionaries
- Pretty-print structured settings using
pprint - Add grouping for settings categories
- Improve redaction for nested values
- Add tests for permissions, filtering, and redaction
- Extract the settings collection logic into a dedicated service module
- Restrict access to specific groups using
ALLOWED_GROUPSinconf.py, instead of relying on theDEBUGcheck alone - Register a panel tool in
tools.pyso an AI agent can query settings over MCP
Most importantly, you now understand the core pieces of a panel:
- A
panel.pydefinition built onPanelPlugin - A
conf.pyholding yourPanelConfig - A Django view guarded by
panel_config.permission_required - A template rendered inside the admin shell
- Admin integration via the generated scaffolding
- A simple feature implemented end to end
To go deeper on any of these, the dj-control-room-base Building Panels guide is the authoritative reference for the full panel contract: settings, CSS injection, permissions, admin integration, and panel tools.
That foundation makes it much easier to build more ambitious panels next.
A settings explorer is just the beginning.
Once you understand this pattern, you can build panels for practically anything within the Django ecosystem.